
How to Reprogram a Garage Door Opener in 5 Easy Steps (Without Losing Your Mind)
Hey there, fellow garage door warriors! Let’s talk about something we’ve all faced: that moment when your garage door decides it’s done cooperating. Maybe it’s ignoring your remote, responding to your neighbor’s cat, or just giving you the silent treatment. Reprogramming an opener sounds intimidating, but guess what? It’s easier than assembling IKEA furniture—and we promise no leftover screws.
Here at San Francisco Garage Doors, we’ve seen it all—from DIY heroes to “I-touched-one-screw-and-now-the-door-won’t-budge” disasters. Whether you’re dealing with a noisy garage door, a broken spring, or just want to reset your system after a garage door cable replacement, we’ve got your back. And hey, if things get too spicy, you know where to find us (cough San Francisco cough). Let’s dive in!
Step 1: Find Your Opener’s “Reset” Button (It’s Hiding, We Swear)
First rule of garage door club: always locate the reset button. It’s like Where’s Waldo, but with more grease. Most openers have a small, unassuming button on the back or side labeled “Learn,” “Program,” or “Reset.” If your opener’s older than your smartphone, check the manual (or Google the model number—no judgment here).
Pro Tip:
- Unplug the opener first. Safety first, folks.
- If your door’s been jerking or making noises like a disgruntled robot, this reset might solve minor issues. But if the garage door track repair or garage door spring replacement is the real culprit, reprogramming won’t fix it. (We’ll tackle that later.)
Step 2: Clear the Opener’s Memory (Say Goodbye to Old Codes)
Think of this as a digital detox for your garage door. Holding down the reset button for 10–30 seconds (varies by brand) wipes all existing codes. The opener’s light will blink or change color to confirm. Now, it’s a blank slate—no more rogue remotes from the previous owner.
Why This Matters:
- Prevents “ghosted” remotes from haunting your system.
- Fixes issues caused by outdated codes (like a door that opens randomly at 2 a.m.).
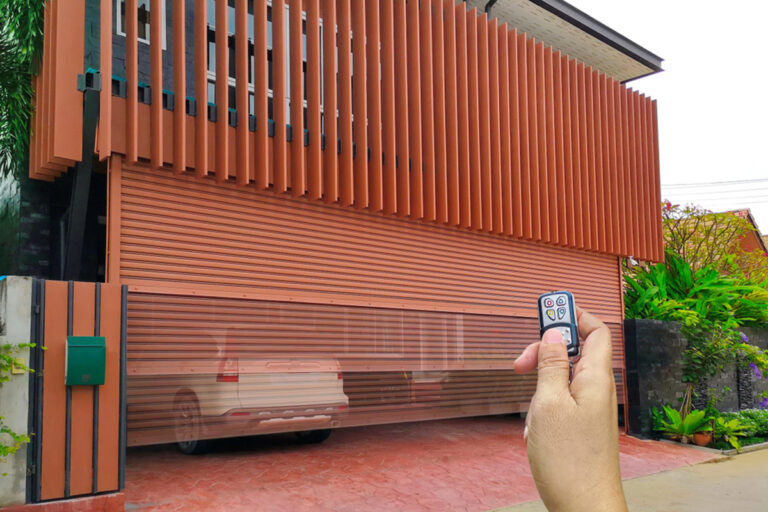
Step 3: Reprogram Your Remotes (Channel Your Inner Tech Wizard)
Time to sync your remotes! Press the reset button again until the light blinks, then quickly hit the button on your remote. The opener’s light will confirm with a happy blink or beep. Repeat for every remote, keypad, or car-built-in system.
Gotcha Moments:
- If it fails, replace the remote’s battery. (We call this the “90% solution.”)
- For automatic garage door opener installations, ensure the motor unit is within range. Walls and microwaves love blocking signals.
Step 4: Test the Safety Sensors (Because Nobody Wants a Door-Slam Surprise)
Modern openers have sensors near the floor that stop the door if something’s in the way. After reprogramming, wave a broomstick under the door while closing it. If it doesn’t reverse immediately, adjust the sensor alignment or clean the lenses.
FYI: Misaligned sensors cause more “my door won’t close!” meltdowns than actual mechanical failures.
Step 5: Lubricate & Do a Final Check (Treat Your Door Like a Fancy Bicycle)
Once everything works, show your door some love:
- Lubricate the garage door track and rollers with silicone spray (WD-40 is not a long-term fix).
- Tighten loose bolts.
- Listen for grinding or squeaking—a sign you might need garage door maintenance or garage door coil spring repair.
When to Call the Pros:
- If the door still jerks, grinds, or refuses to budge, you might be dealing with a broken spring, snapped cable, or worn-out motor. San Francisco Garage Doors handles everything from commercial garage door repairs to automatic garage door installations—because sometimes, YouTube tutorials just don’t cut it.
Common Garage Door Issues & Quick Fixes
Here’s a cheat sheet for troubleshooting between service calls:
| Issue | Likely Culprit | Fix |
|---|---|---|
| Noisy garage door | Dry rollers/track | Lubricate with silicone spray |
| Door jerks | Misaligned track or broken cable | Garage door track repair or cable replacement |
| Opener doesn’t respond | Dead battery or signal interference | Replace battery/reprogram |
| Door reverses mid-close | Dirty/misaligned sensors | Clean sensors or adjust alignment |
4 Burning Questions (Answered Without the Jargon)
1. “How much does garage door opener repair cost?”
Prices vary, but basic fixes start around $150. For automatic garage door opener installations or commercial garage door repairs, expect $300+. Always get a quote first—we’re transparent about costs at San Francisco Garage Doors.
2. “Why does my garage door sound like a horror movie soundtrack?”
Dry parts, loose hardware, or a broken spring. Lubricate, tighten, or call us before it turns into a Halloween attraction.
3. “Can I replace a garage door spring myself?”
IMO: Nope. Springs are under insane tension and can cause serious injury. Leave garage door spring replacement to the pros.
4. “How often should I maintain my garage door?”
Twice a year! Lubricate moving parts, test the sensors, and check for wear. Think of it as a dental checkup for your door.
Final Thoughts: Keep Calm and Reprogram On
Reprogramming a garage door opener isn’t rocket science—it’s more like defusing a bomb while mildly annoyed. But with these steps, you’ll save time, money, and maybe your sanity. And hey, if you’re in the Bay Area and things go sideways, San Francisco Garage Doors is just a call away. We handle garage door repairs, installations, and even emergency fixes for doors that’ve officially given up.
Remember: A smooth garage door is a happy garage door. And if yours isn’t? Well, you know who to blame (kidding… mostly).
Stay savvy, friends! 🛠️